Prologue: The Failed Attempt

Pre-production is rolling along for Season Two of Scenes. Props are being located and obtained. The cast and crew are falling into place. I have a new location for the shoot, but it's not a studio. I have to build it out. Which means I need to create the green screen. Lucky for me, I have a giant wall to work with. So I decide to go the paper green screen route. Our plan was to tape over the duct tape with Chroma Key tape, but we had not yet purchased it. The problem was the upper right corner peeled off and everything came down. Granted, it wasn't exactly the flattest surface, so it probably was already a failed option.
1. Get Your Supplies
You Will Need: Ladder, Paint Rollers, Painter's Tape, Plastic Drop Cloth, Sheet Rock Putty, Putty Knife, Chroma Key PaintWhat to do. Time to paint the wall. I hop onto Amazon.com and find some Chroma Key Paint. $50 a can? (Price went up!) After cursing to myself, I click "purchase". Then I realize I need to get this paint to me ASAP. Overnight, please. (I cursed aloud when I saw the shipping fee) Nothing I could do about. Purchase!
Wednesday comes around. 12pm. I begin.
2. Spackle and Tape

Notice the bordered paint tape. The first thing I did was spackle a ton of holes in the wall and then sandpaper those bad boys flat. Then came the primer. After 15-20 minutes waiting for the primer to dry, because I'm impatient, I taped the box on the wall. I wasn't real confident about painting the entire wall, so I created a giant box. And I didn't want to mess with painting to the floor, so there will be some space on that bottom. Honestly, it won't be a big deal come shoot time.
3. Paint
Simple enough. You will need to fill in the painted box that you have already created with your painter's tape. Look at those rolling strokes. It's a work of art. This location is actually a space used by a local theater group, but before that it was used by an artist in the area. While working on this, someone asked me if I was creating a canvas. In way, I guess I was.
4. Paint Again: The 2nd Coat

You may have noticed that I did not use a primer coat. You can, if you'd like. I chose not to here because the wall was already a white color and the chroma key paint is so bright and solid, I didn't think I needed a primer coat.
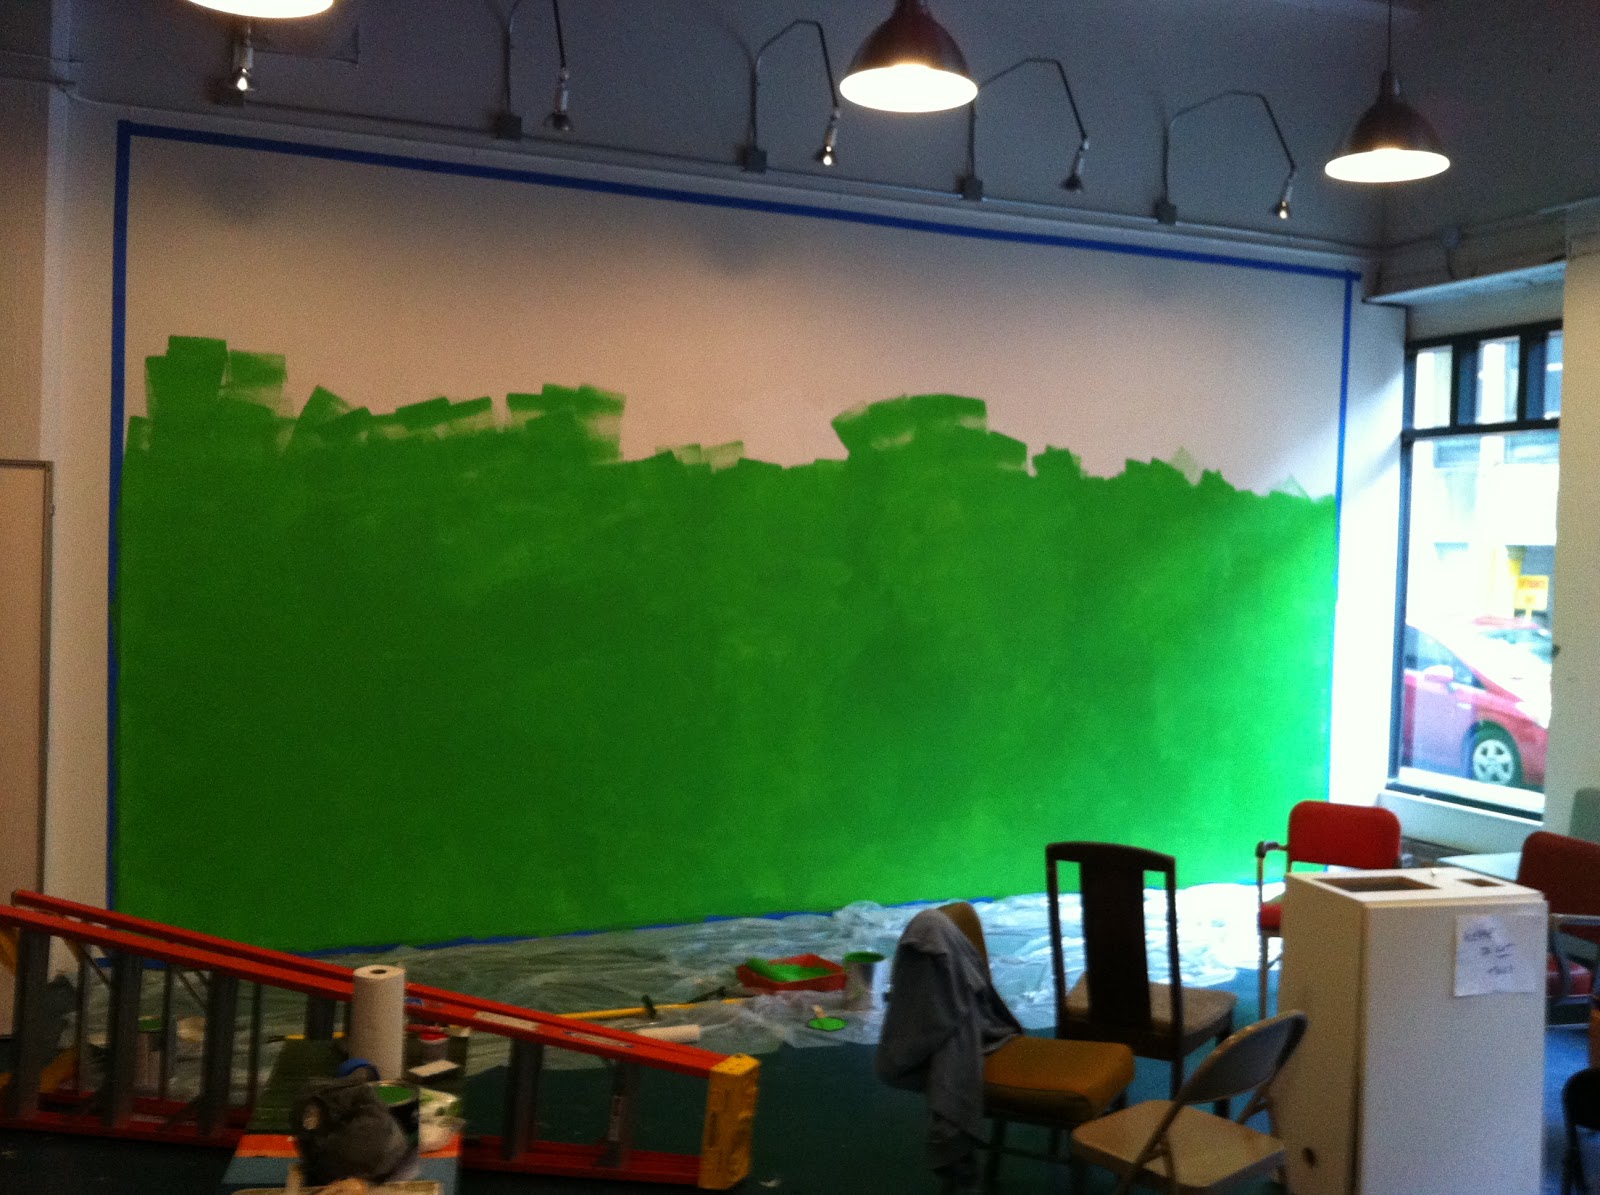
First coat (above). Look at those wet blotches! Awesome. I wasn't freaking out, but I did want it to dry fast because I needed to see a closer to a finished product.
5. Paint Again: The 3rd Coat

Second coat. I sent this pic to a few people, to which I received one response of "It needs another coat." This, of course, I figured but I was hesitant to tap into the second can of Chroma Key Paint. So far, we've been on one can. But I knew that second can was calling my name. At this point, I talked fantasy football with a friend of mine on the phone and then I grabbed a late, late lunch.
Looking back, if I did a primer coat then maybe a third coat wouldn't have been needed. Then again, doing a primer would've made the 2nd coat of chroma key paint a third coat of painting the surface anyway. I'd rather have three coats of chroma key paint. then 2 coats and a one coat of primer.
6. Shoot Your Content

Done! Look at that neat green screen box! So pretty. I didn't have much faith in my painting abilities and as my wife can attest to, I was a bit frantic in making sure I was able to get this done correctly. But I'm proud of it. We have our location. We have our cast. We have our crew. We have our equipment. We're ready to rock and roll on Season Two.
We still have some other things that need to get done. Notably those windows on the right will be blocked out and those lights won't be on. We'll have our own, of course. A green screen needs to have an even light spread in order to have an even image projected on its background in post-production. But we're good to go otherwise.
I was told I might have to paint this back over white, but let's hope I don't. I was thinking I'd drop a black circle in the lower left corner and a white circle in the upper right corner. Attach a golf club to the wall and call the whole thing an installation. A work of art that will never be removed!
This is awesome! I'm glad you listed all of the materials needed at the top, and where to get from Amazon. I never knew how to create a one, and I love to paint. So, maybe if I ever need to make one I can use this in order to do so, a lot of my friends work in theater as well as some small films too. I think your layout is well done, easy to read and follow. Photo's are great too!
ReplyDeleteCaptain Fancy Pants again,
ReplyDeleteThis was a great post especially since there are images. I personally am much more of a visual learner. Anyways, I always wondered about green screens and how they are made and how they work. I remember watching shows like "Whose Line is it Anyways" which is an improvise show and they utilized a green screen in a lot of their skits.
I also always wondered why they chose the color green. Apparently green is used because it is easy for cameras to pick up. Also, since the specific green used for these screens is not very common, presenters can be shown in front of the screen and not be lost. This is due to the fact that the colors on their cloths do not match the green screen. This is what I heard not sure if it is 100% accurate.